Build a Mini Greenhouse Using Old Windows
Introduction
Dreaming of fresh herbs year-round or a head start on your spring seedlings? Building a mini greenhouse using old windows is a fantastic, eco-friendly, and budget-conscious solution. This project repurposes discarded materials, reduces waste, and provides a cozy haven for your plants. Let’s explore how to create your own miniature greenhouse oasis!
Main Sections
Planning & Preparation
Before you start wielding a hammer, careful planning is key to a successful mini greenhouse build.
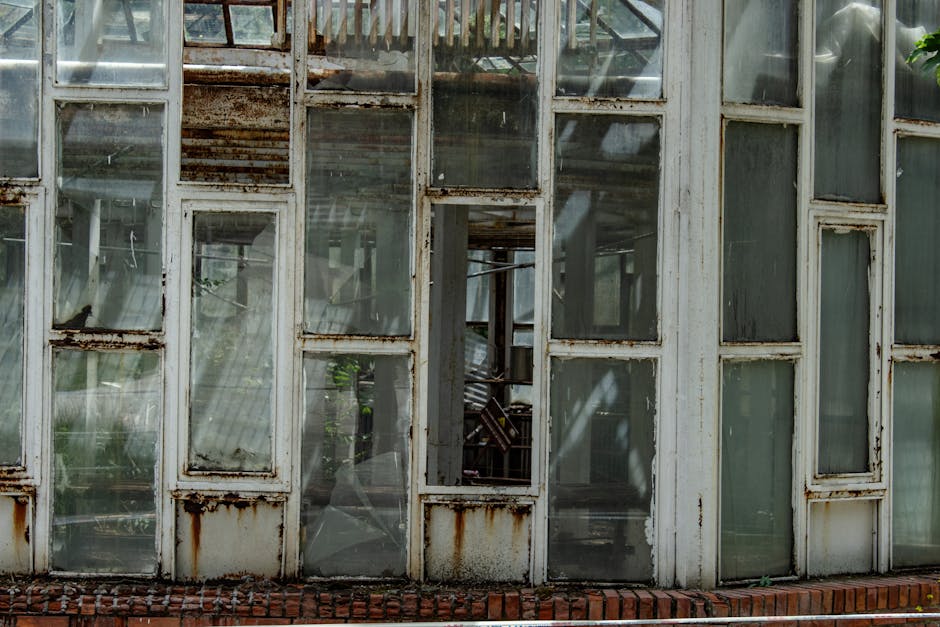
- Gather Your Windows: Source old windows from salvage yards, online marketplaces, or renovation projects. Ensure they’re structurally sound, but don’t worry too much about minor imperfections – they add character! Prioritize windows of similar sizes for easier construction.
- Design Your Greenhouse: Consider the size of your garden and the amount of space you have available. Sketch out your greenhouse design. Common shapes include a simple A-frame, a box shape, or a lean-to. A-frame designs are easy to build, while box shapes offer more headroom.
- Tools & Materials: Beyond the windows, you’ll need:
- Wood for framing (pressure-treated recommended for ground contact)
- Screws or nails
- Measuring tape
- Saw (circular saw or hand saw)
- Drill
- Safety glasses
- Work gloves
- Caulk or sealant (for weatherproofing)
- Hinges (for a door or vent)
- Latch (for the door or vent)
Building the Frame
The frame provides the structural support for your window greenhouse.
- Cut the Wood: Based on your design, measure and cut the wood pieces to create the frame. Ensure accurate measurements for a snug fit.
- Assemble the Frame: Join the wooden pieces together using screws or nails. Create a sturdy rectangular or A-frame base, depending on your chosen design. Double-check that all corners are square.
- Attach the Windows: Carefully position the windows onto the frame. Secure them with screws, making sure they are evenly spaced and flush with the frame. Pre-drilling pilot holes can prevent the wood from splitting.
Adding a Door or Vent
Ventilation is crucial for regulating temperature and preventing overheating inside the greenhouse.
- Choose a Location: Decide where you want the door or vent to be located. Ideally, place it on a side that doesn’t receive direct sunlight during the hottest part of the day.
- Construct the Door/Vent: Use a smaller window or a piece of wood to create the door or vent.
- Attach Hinges and Latch: Install hinges to connect the door/vent to the frame and a latch to secure it closed.
Finishing Touches & Weatherproofing
Protect your mini greenhouse from the elements and make it last.
- Caulk the Seams: Apply caulk or sealant around the edges of the windows and where the frame meets the ground to prevent drafts and moisture from entering.
- Add a Foundation: Consider creating a gravel or brick foundation to elevate the greenhouse and improve drainage.
- Interior Shelving (Optional): Add shelves inside the greenhouse to maximize space and organize your plants.
Optimizing Your Greenhouse for Plant Growth
Maximize growth using these tips:
- Sunlight Exposure: Position your greenhouse where it receives at least 6 hours of direct sunlight per day. Southern exposure is ideal.
- Temperature Control: Monitor the temperature inside the greenhouse. Open the door or vent during warmer days to prevent overheating. Consider using a small fan for better air circulation.
- Watering: Water your plants regularly, but avoid overwatering. The enclosed environment can trap moisture.
- Soil and Nutrients: Use high-quality potting soil and fertilize your plants as needed.
Conclusion
Building a mini greenhouse from old windows is a rewarding and sustainable project. Not only does it provide a protective environment for your plants, but it also adds a unique and charming element to your garden. With a little planning and effort, you can enjoy fresh herbs and vegetables throughout the year, all while giving discarded materials a new lease on life. Happy gardening!


Post Comment