Turning Repurposed Fabric Scraps into Quilts
Introduction
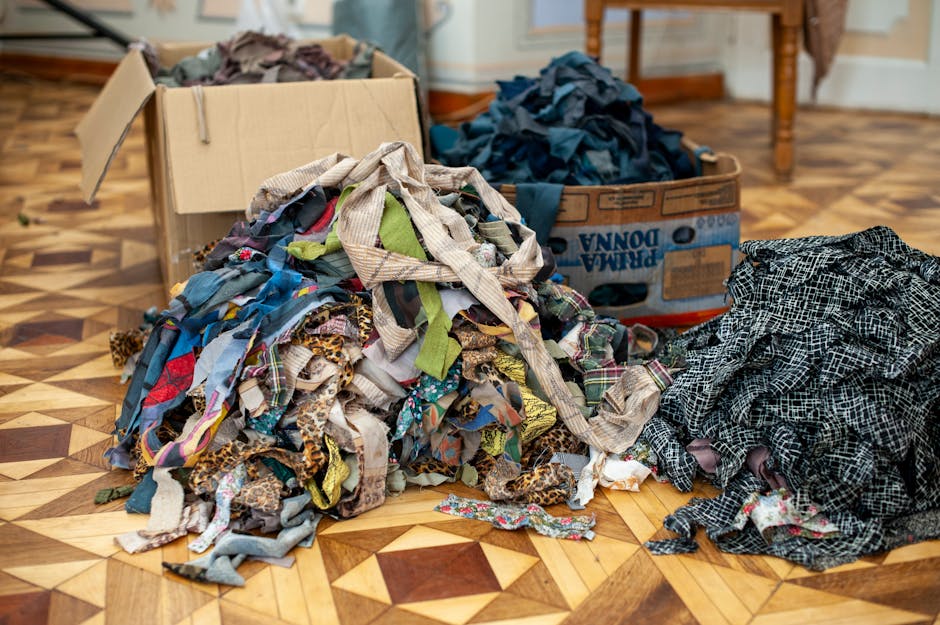
Do you have a mountain of fabric scraps gathering dust? Instead of tossing them, why not transform them into a beautiful and unique quilt? Quilting with repurposed fabric scraps is a fantastic way to reduce textile waste, unleash your creativity, and create a treasured heirloom. This guide will walk you through the process, providing tips and tricks for crafting stunning quilts from leftover materials.
Turning Fabric Scraps into Quilts: A Step-by-Step Guide
Sourcing and Preparing Your Fabric Scraps
The first step is gathering and preparing your fabric. Look beyond your own sewing stash! Consider:
- Your Own Sewing Projects: Save every little piece!
- Friends and Family: Ask if they have scraps they’re willing to donate.
- Thrift Stores and Estate Sales: Often, you can find bundles of fabric for a bargain.
- Online Fabric Swap Groups: A great way to exchange scraps with other quilters.
Once you’ve collected your scraps, it’s time to prepare them:
- Wash and Dry: This will pre-shrink the fabric and remove any dirt or sizing.
- Iron: Pressing the scraps will make them easier to work with and ensure accurate cutting.
- Sort and Organize: Group your scraps by color, pattern, or fabric type to inspire your design.
Choosing a Quilt Pattern
Selecting the right quilt pattern is crucial. Here are some patterns that work well with fabric scraps:
- String Quilts: Utilize long, thin strips of fabric sewn onto a foundation.
- Charm Quilts: Use squares of fabric, each a different pattern or color.
- Crazy Quilts: A free-form style where fabric pieces are sewn together randomly.
- Log Cabin Quilts: Build up blocks using strips of fabric around a center square.
- Scrappy Trip Around the World: A visually interesting pattern made from strips of different colors.
Cutting and Piecing Your Fabric
Accuracy is key for a well-made quilt. Here’s how to cut and piece your fabric:
- Cut Accurately: Use a rotary cutter, ruler, and cutting mat for precise cuts.
- Consistent Seam Allowance: Maintain a consistent ¼ inch seam allowance throughout your project.
- Chain Piecing: Sew multiple pieces together without cutting the thread between them to save time.
- Press Seams: Press seams open or to one side, depending on the pattern instructions.
Assembling Your Quilt Top
Once your blocks are pieced, it’s time to assemble the quilt top:
- Layout Your Blocks: Arrange the blocks according to your pattern, paying attention to color and pattern placement.
- Sew the Blocks Together: Join the blocks in rows, then sew the rows together to create the quilt top.
- Press the Quilt Top: Press the entire quilt top to flatten seams and ensure a smooth surface.
Quilting and Binding
The final steps involve quilting and binding:
- Layer Your Quilt: Create a quilt sandwich consisting of the quilt top, batting, and backing fabric.
- Quilt the Layers Together: Quilt the layers together using hand quilting, machine quilting, or longarm quilting. Consider simple designs like straight lines, meandering patterns, or echo quilting.
- Bind the Edges: Add binding to the edges of the quilt to create a finished and durable edge.
Conclusion
Turning repurposed fabric scraps into quilts is a rewarding and eco-friendly way to create beautiful and functional pieces of art. By following these steps and embracing your creativity, you can transform those leftover fabrics into a cherished quilt that will be treasured for years to come. So, gather your scraps, choose a pattern, and start quilting!


Post Comment