Looking to add a warm and inviting glow to your home or outdoor space? Forget store-bought lighting! Creating your own diy candle lanterns is a fun, budget-friendly project that allows you to personalize your decor and impress your guests. From rustic designs to elegant centerpieces, the possibilities are endless. Get ready to unleash your creativity and bring a touch of magic to any setting!
Benefits of diy candle lanterns
Why choose the DIY route when it comes to candle lanterns? The benefits extend far beyond just saving a few bucks. Here are just a few reasons to consider crafting your own:
- Personalized Style: You have complete control over the design, materials, and finishes, ensuring your lantern perfectly complements your existing decor.
- Budget-Friendly: Repurpose old jars, wood scraps, or metal containers into stunning lanterns without breaking the bank.
- Eco-Friendly: Upcycling materials reduces waste and gives a new life to items that might otherwise end up in the trash.
- Creative Outlet: DIY projects are a fantastic way to de-stress, express your creativity, and learn new skills.
- Unique Gifts: Handcrafted candle lanterns make thoughtful and personalized gifts for friends and family.
Plus, there’s a special satisfaction that comes from creating something beautiful with your own hands! Related article.
Step-by-Step Guide
Ready to get your hands dirty? Here’s a general step-by-step guide to creating a simple yet stunning diy candle lantern. Remember to always exercise caution when working with tools and flames.
Gather your materials
Before you start, gather all the necessary materials. This will vary depending on the design you choose, but here are some common items:
- Glass jars (mason jars, pickle jars, etc.)
- Wood scraps (pallet wood, fence pickets, etc.)
- Metal containers (coffee cans, paint cans, etc.)
- Wire or rope for hanging
- Paint, stain, or other decorative finishes
- Sand or pebbles for the base (optional)
- Candles (tea lights, votives, or pillar candles)
- Tools (hammer, nails, saw, drill, paintbrush, glue gun, etc.)
Having everything prepared beforehand will make the process much smoother.
Prepare the base
The base of your lantern will provide stability and support for the candle. Depending on the materials you’re using, this step may involve cutting wood, drilling holes, or reinforcing the container.
For a glass jar lantern, simply add a layer of sand or pebbles to the bottom for added stability and visual appeal.

Create the structure
This is where your creativity shines! Use wood, metal, or wire to create the frame or structure around the base. This could involve building a wooden frame, attaching wire mesh, or simply wrapping the jar with rope.
Ensure the structure is sturdy enough to protect the candle flame from wind and prevent it from tipping over. Be sure to leave openings for ventilation and easy access to the candle.

Add decorative elements
Now for the fun part! Decorate your lantern with paint, stain, stencils, or any other embellishments you desire. Consider adding a rustic touch with twine or burlap, or create an elegant look with metallic paint and intricate patterns.
Let your imagination run wild and personalize your lantern to reflect your unique style. Don’t be afraid to experiment with different colors, textures, and designs!

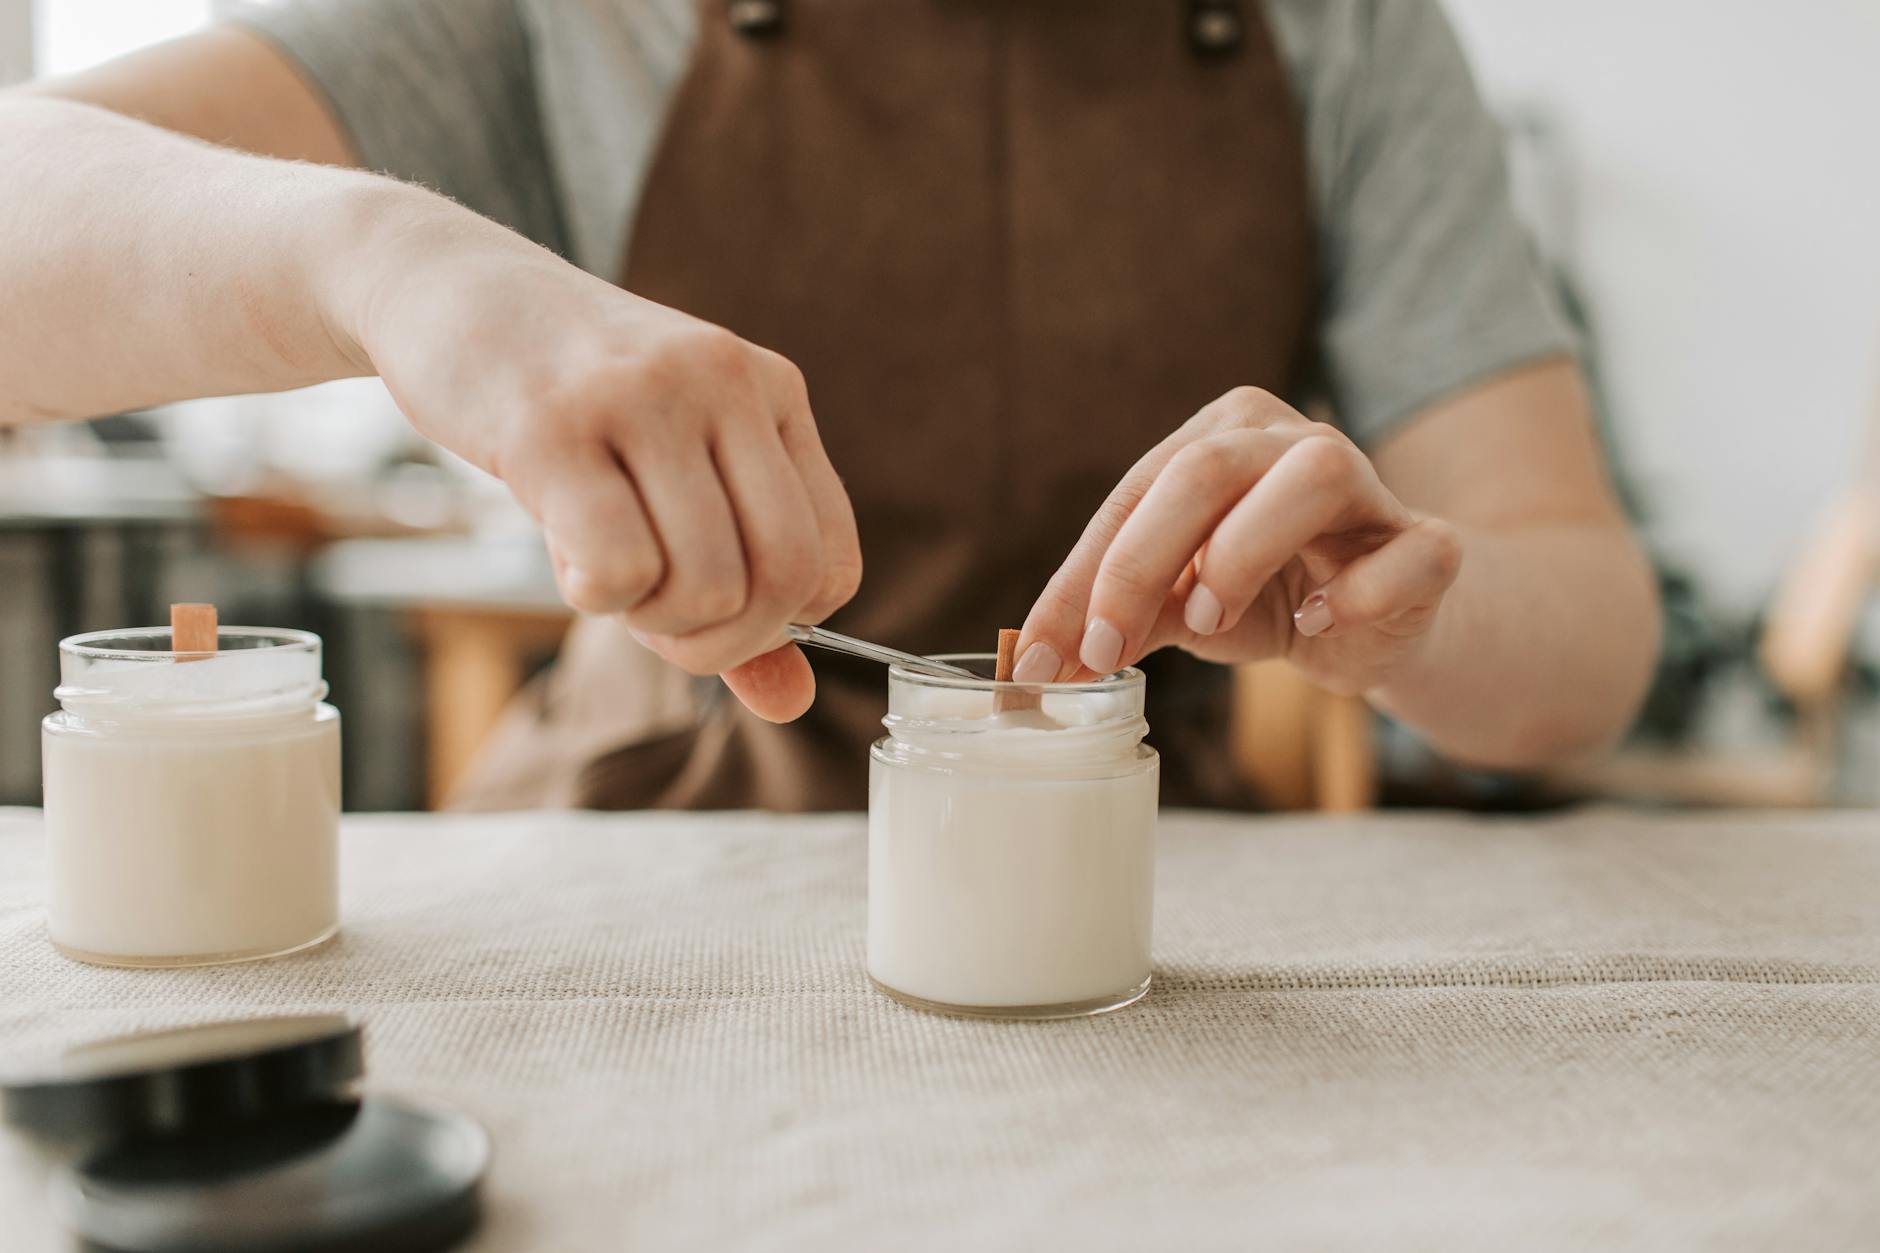
Insert the candle and enjoy
Once the decorative elements are dry, carefully place the candle inside the lantern. Use a tea light, votive, or pillar candle that fits comfortably within the structure.
Light the candle and enjoy the warm, inviting glow of your handmade creation. Remember to never leave a burning candle unattended and keep it away from flammable materials.

Tips for perfect diy candle lanterns
Want to take your diy candle lantern skills to the next level? Here are some tips to help you achieve professional-looking results:
- Plan your design: Before you start, sketch out your design and gather all the necessary materials. This will help you stay organized and avoid any surprises along the way.
- Use high-quality materials: Investing in quality materials will ensure your lantern is durable and long-lasting.
- Pay attention to detail: Small details can make a big difference in the overall look of your lantern. Take your time and pay attention to the finishing touches.
- Seal your work: If you’re using wood or metal, consider sealing it with a waterproof sealant to protect it from the elements.
- Consider safety: Always prioritize safety when working with tools and flames. Use caution when handling sharp objects and never leave a burning candle unattended.

Common mistakes to avoid with diy candle lanterns
Even experienced DIYers can make mistakes. Here are some common pitfalls to avoid when crafting your own candle lanterns:
- Using flammable materials: Avoid using materials that are easily flammable, such as paper or thin fabric, near the candle flame.
- Poor ventilation: Ensure your lantern has adequate ventilation to prevent the candle from suffocating or overheating.
- Unstable base: Make sure the base of your lantern is stable and won’t tip over easily.
- Leaving a burning candle unattended: This is a major safety hazard. Never leave a burning candle unattended, especially around children or pets.
- Ignoring weather conditions: If you’re using your lantern outdoors, consider the weather conditions. Avoid using it in strong winds or rain.
Being aware of these mistakes will help you create safe and beautiful lanterns. source.
Frequently asked questions about diy candle lanterns
Still have questions about diy candle lanterns? Here are some frequently asked questions to help you get started:
- What kind of candles should I use? Tea lights, votives, and pillar candles are all good options. Choose a size that fits comfortably within your lantern.
- Can I use battery-operated candles? Absolutely! Battery-operated candles are a safe and convenient alternative to traditional candles.
- How do I clean my candle lantern? Wipe down the lantern with a damp cloth to remove any dust or debris. For tougher stains, use a mild soap and water solution.
- Can I use my lantern outdoors? Yes, but make sure it’s protected from the elements. Sealing the materials with a waterproof sealant will help prevent damage from rain and moisture.
- Where can I find inspiration for my diy candle lantern? Pinterest, Instagram, and home decor blogs are great sources of inspiration.
Conclusion & Final Thoughts
Creating your own diy candle lanterns is a rewarding and fulfilling project that allows you to personalize your space and add a touch of warmth and ambiance. With a little creativity and some basic materials, you can transform ordinary objects into stunning works of art.
So gather your supplies, unleash your imagination, and get ready to create beautiful, one-of-a-kind candle lanterns that will brighten up your home for years to come. Remember to prioritize safety, pay attention to detail, and most importantly, have fun!